Peanut Butter Butterfinger Cheesecake Recipe
You ever bite into something so rich, so stupidly indulgent, that you gotta sit down for a second? That’s this cheesecake.
This is not your average sweet treat. It’s a Peanut Butter Butterfinger Cheesecake crunchy, creamy, nutty, and unapologetically decadent. If you’re a pastry chef, bakery owner, or just someone who treats their dessert menu like a work of art, this one’ll turn heads and stop scrolls.
But hold up. We’re not just throwing together candy bars and cream cheese. This is a complex multi-texture build, balancing salt, sweet, crunch, and melt.
We’re about to unpack the craft behind this beast.
Why Butterfinger and Peanut Butter Work Like Magic
You don’t need a food scientist to tell you why peanut butter and Butterfinger are a match made in dessert heaven. But let’s be nerdy for a sec.
Butterfinger’s texture that flaky, toffee-like crisp offers a rare crunch that doesn’t go soggy too quick. Pair that with the creamy density of peanut butter and you’ve got a full-mouth experience. This combo stimulates both Maillard sweetness (from the bar) and fatty satisfaction (from the peanut butter). You’re not just feeding people you’re hitting their brain’s pleasure center hard.
Also, candy bar cheesecakes are trending again. Post-2020, people want comfort food with a nostalgia punch. This recipe? It’s Gen X, millennial, and Gen Z approved all at once.
Ingredient Strategy: Quality Over Quantity
Let’s break this thing down by components each with a purpose.
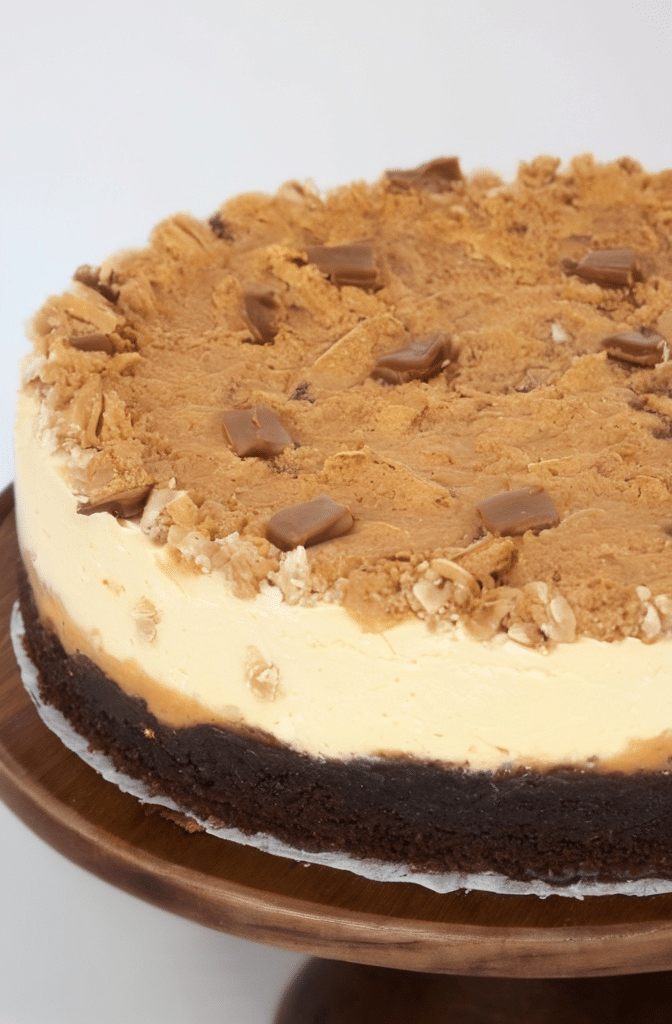
The Crust
Forget graham crackers. We’re going Oreo base here preferably Double Stuf if you wanna flex.
- 24 Oreo cookies (don’t scrape off the filling)
- 5 tbsp melted butter
- Optional: pinch of salt if your butter’s unsalted
Pulse the cookies in a processor till sandy. Drizzle in melted butter. Smash into a springform pan like you mean it. Use a flat-bottomed glass for even pressure.
Bake at 350°F (175°C) for 8-10 mins. Let it cool while you prep the rest.
The Filling: Creamy, Rich, Not Cloying
This is where most folks mess up. Too much sugar + peanut butter = sickly.
Use:
- 24 oz full-fat cream cheese (room temp!)
- 1 cup creamy peanut butter (not the natural kind, unless you’re okay with oil separation)
- 1 cup granulated sugar
- 1 tsp vanilla extract
- 3 large eggs
- 1/2 cup sour cream
- 1/4 cup heavy cream
- 1/2 tsp salt
- 6 crushed Butterfinger bars (regular size, not mini)
Now here’s the trick: beat your cream cheese for a full 3 minutes. No shortcuts. Air matters. Then mix in the sugar + peanut butter till smooth. Eggs go in one at a time — don’t rush this, or you’ll get that weird bubble top.
Fold in sour cream, heavy cream, and crushed Butterfinger. Don’t overmix after adding the bars keep some chunks.
Pour this majestic mess onto your crust. Tap the pan hard on the counter 3–4 times to release air bubbles.
Bake in a water bath at 325°F (162°C) for about 60–70 minutes. You want the edges set, but the center to jiggle like it’s unsure of its life choices.
Cool in the oven with the door cracked. Sudden temp changes = cracks.
Pro Topping Techniques: Don’t Just Dump Ganache
Here’s where artistry matters. Most amateurs slap on a ganache like it’s frosting. No. You’re a pro. Respect layering.
First layer: peanut butter glaze
– 1/2 cup powdered sugar
– 1/4 cup creamy peanut butter
– 2 tbsp milk (add more if needed)
Whisk till pourable. Drizzle across the top like a spiderweb. Set in fridge.
Second layer: dark chocolate ganache
– 4 oz dark chocolate, chopped
– 1/2 cup heavy cream
Heat cream to a simmer. Pour over chocolate. Let sit 2 mins, then stir smooth. Let it cool just a bit you want pourable, not hot lava.
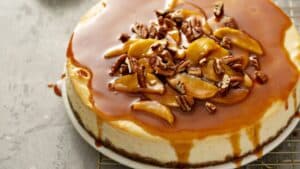
Pour gently in the center, let it ripple outward. Use an offset spatula to nudge it toward the edges. Not over the edge that’s cheesecake murder.
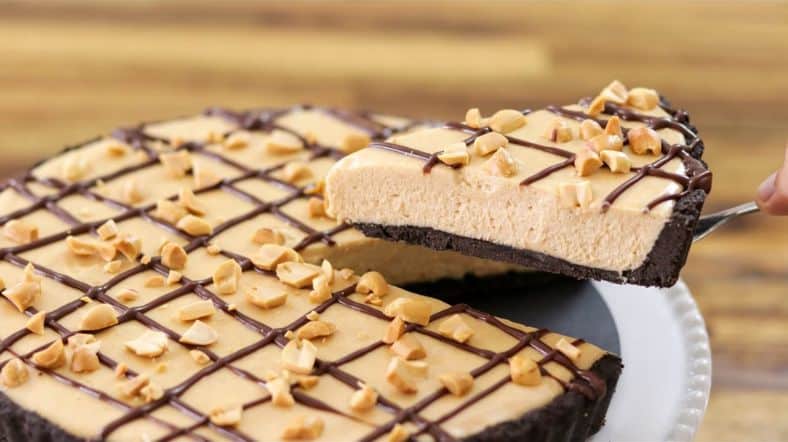
Finish with rough-chopped Butterfinger and salted roasted peanuts for texture and salt contrast.
Refrigerate overnight. Yes, overnight. None of this “2-hour chill” nonsense. You’re not a rookie.
Storage and Shelf Life: A Baker’s Reality Check
Shelf life? 4–5 days max in a sealed container in the fridge.
Butterfinger bits can go soggy if exposed too long. That’s why I recommend adding final garnish just before serving especially in bakery displays.
This cheesecake also freezes beautifully (sans ganache). Wrap in plastic, then foil. Lasts 2 months easy. Thaw in fridge overnight.
Cost and Menu Viability for Professionals
Let’s talk numbers ‘cause pro kitchens care.
Ingredient cost (bulk purchase):
- Crust + filling (sans Butterfinger): ~$12
- Butterfinger bars (6 full): ~$4 wholesale
- Ganache + toppings: ~$3
- Total: ~$19
You’ll get 12 dense slices. That’s $1.58 per slice cost.
Upsell price at cafes or bakeries? Easily $6–$7/slice depending on region. Higher if served plated with cream or coulis.
Profit margin: 75%+. Not bad for a “novelty” cheesecake.
Troubleshooting Common Mistakes
- Cracked top
You either overbaked, didn’t use a water bath, or chilled too fast. Solution? Use low temp and be patient. Even a cracked cake tastes good, but don’t rely on ganache to fix bad structure. - Gummy texture
Undermixed cream cheese, or used cold ingredients. Also, never overmix after adding eggs that whips in air and causes density loss. - Butterfinger turned gooey
You added it too early or used stale bars. Buy fresh and fold gently. - Too sweet
Cut the sugar back by 2 tbsp if needed. Also, using dark chocolate in the ganache balances out the sweetness. Avoid milk chocolate unless your customer base likes syrupy desserts.
Elevation Ideas: Make It Your Signature
Want to make this recipe stand out? Try this:
- Torch the top before adding ganache for a smoky layer (just a sec, not crème brûlée)
- Infuse the crust with a tbsp of espresso powder adds dimension
- Replace half the Oreo crust with pretzels for salt and crunch
- Spike the filling with bourbon or peanut liqueur for adult-only service
Create a mini cheesecake version in muffin tins for individual servings. Great for catering and easy to portion.
Industry Insight: Why This Dessert Sells
Butterfinger + peanut butter has emotional equity it reminds people of after-school snacks, Halloween bags, and childhood lunches.
In a 2023 consumer dessert trend report (Food Business News), 60% of customers aged 25–40 said they prefer desserts that blend classic flavors with “modern formats.” That’s exactly what this cheesecake does.
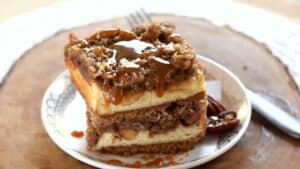
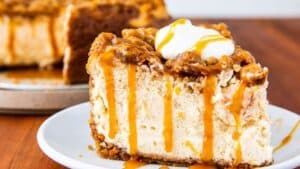
And don’t forget Instagram. This cake looks insane when sliced. The layered interior with streaks of crushed bar running through the filling? Pure content gold.
Final Takeaways: Go Bold, But Stay Balanced
This isn’t a dainty dessert. It’s not for spa menus or juice bars. This is a cheesecake that owns the plate and makes people moan a little.
But it’s not junk food either. It’s a thoughtfully structured, flavor-layered build with pro-level technique.
The key?
- Balance the sweetness with salt and fat
- Layer textures carefully
- Give it time — chill overnight
- Garnish right before serving
- Sell it proudly
Wanna get repeat customers? This is the kind of cheesecake that gets people to ask, “Wait do you do custom orders?”
Yeah. It’s that good.
Now go make it. Or better put it on your menu and let it do the talking.