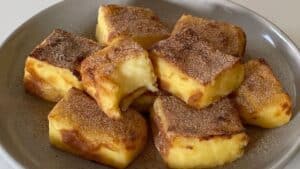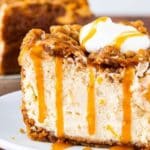
No oven? No worries. When you’re in the thick of prep for a fall dessert menu and your ovens are already working overtime on pies, tarts, and roasting squash, no bake pumpkin cheesecake bars show up like an unexpected sous chef efficient, creamy, crowd-pleasing. These little bars are a secret weapon for pastry chefs who know that simplicity, when done with precision, can turn heads.
This isn’t your average Pinterest fluff. These bars, when properly built, can deliver restaurant-grade texture and balance. Done wrong, though? Soggy crusts, gelatin nightmares, and a pumpkin flavor that disappears under cream cheese.
This guide goes deep. Like, scraping-the-bowl kind of deep.
The Why: Why No Bake Pumpkin Cheesecake Bars Deserve a Spot on the Menu
Here’s a stat for ya: according to Technomic’s Dessert Consumer Trend Report, seasonal LTOs (limited-time offerings) in desserts increase foot traffic by 19%. You read that right—nineteen percent. Pumpkin is the reigning queen of seasonal flavor from September to November. Cheesecake? Always in vogue.
Combine the two in a no-bake format, and you’ve got:
- A cold dessert that contrasts beautifully with warm entrees.
- A prep-ahead dream that keeps its integrity in the walk-in for 3–4 days.
- Minimal equipment use—no water bath, no cracking stress, no oven rotation issues.
It’s like baking, but not. Which is great when you’re juggling 17 orders at once and the oven’s packed tighter than a downtown brunch line.
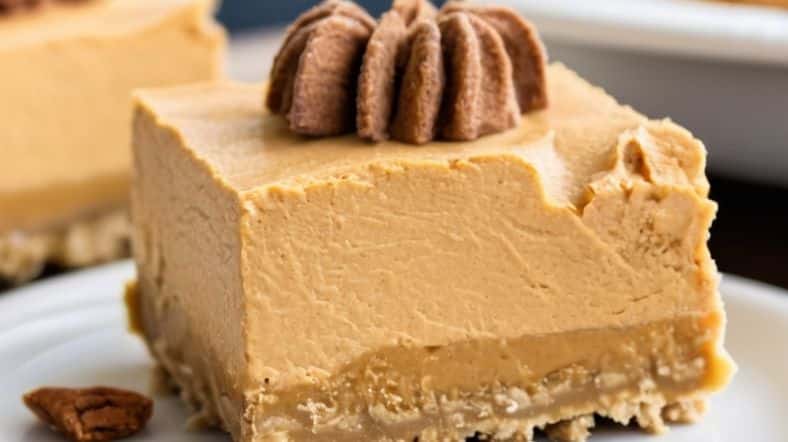
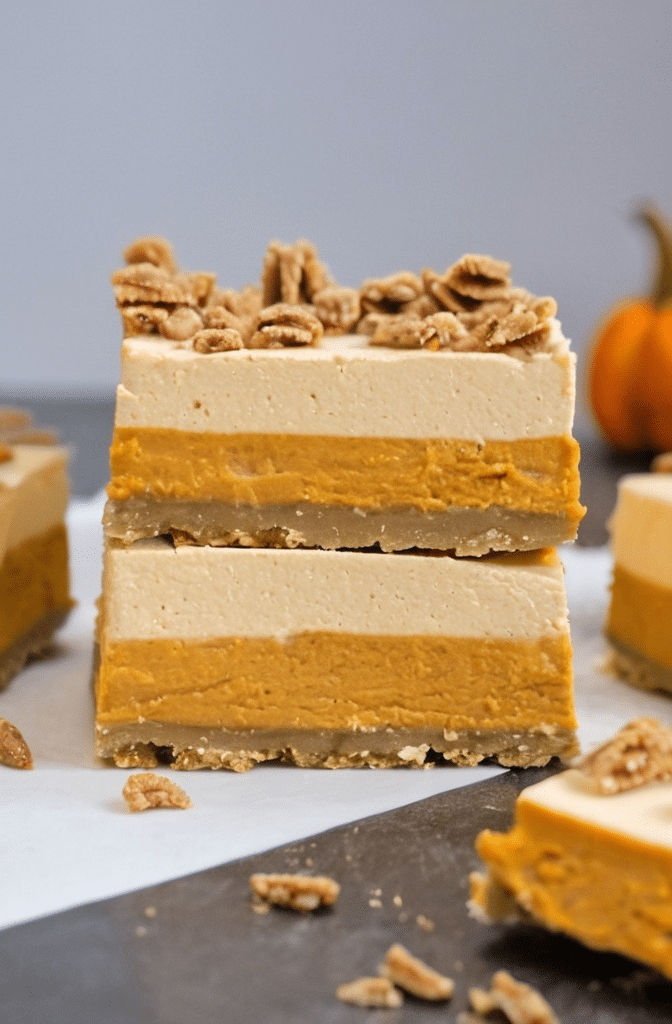
The Crust – More Than Just a Base
This ain’t just a crushed graham cracker moment. No. You’re setting the stage here.
Gingersnap cookies bring a deeper spice that complements pumpkin better than graham crackers ever could. They’ve got backbone. Toasted pecans? Optional—but if you don’t add them, don’t tell me you’re after depth of flavor.
Pro tip: Add a touch of salt to the crust mix. Not optional. It’s the difference between just-sweet and wow-this-tastes-like-something.
Here’s a chef’s ratio:
- 2 cups gingersnap crumbs
- ½ cup toasted pecans (finely chopped)
- 6 tablespoons melted unsalted butter
- Pinch of fine sea salt
Mix until it holds together like wet sand. If it’s crumbling in your hand? Add a splash more butter. Press firmly into a lined 9×9 pan. Chill. Thirty minutes minimum. Overnight? Better.
Don’t rush it. This base sets the tone.
The Filling – No Gelatin, No Gimmicks
Let’s address the gelatin elephant in the room.
Many no-bake cheesecakes lean on gelatin for structure. But if you’ve ever tasted that weird bounce, like dessert is trying too hard to be Jell-O, you know—it ain’t it. Gelatin alters mouthfeel in a way that’s hard to disguise. In pro kitchens, texture matters. No exceptions.
So, what’s the fix? Stability through fat and chill. You want a balanced cream cheese-to-whipped cream ratio, and that whipped cream needs to be beaten to soft peaks—not stiff, not runny.
Here’s the pro-level formula:
- 16 oz full-fat cream cheese (room temp—non-negotiable)
- ¾ cup pure pumpkin puree (not pie filling, please)
- ½ cup powdered sugar
- ¼ cup light brown sugar (adds depth)
- 1 teaspoon pumpkin pie spice
- ½ teaspoon ground cinnamon (separately—trust)
- 1 teaspoon vanilla extract
- 1 cup heavy cream (cold, whipped to soft peaks)
Whip the cream cheese till it’s fluffy. Add sugars and spices. Fold in the pumpkin puree—do not overmix. Overmixing here breaks the emulsion. You’ll get weeping, and not the poetic kind.
Then gently fold in the whipped cream with a spatula. Fold like you’re hiding a secret in a blanket.
Spread over the crust. Smooth with an offset spatula. Chill overnight.
Yeah. Overnight. Don’t shortcut the set time unless you’re looking to serve a cheesecake soup.
Flavor Development – Spice, Acidity, Sweetness
Pumpkin’s a bit of a blank slate, honestly. It’s earthy, but soft-spoken. Without support, it vanishes.
Spices are obvious, but what separates pros from hobbyists is restraint and balance. Pumpkin pie spice is good, but lazy. Cinnamon and nutmeg fight each other if you go too hard. Add a whisper of clove—just a whisper—or you’ll taste nothing but Christmas.
Vanilla matters here. Use real extract or, even better, vanilla bean paste. One teaspoon is enough to round out the edges.
And here’s the kicker: add acidity.
No, not lemon juice. Not here. Use sour cream (just a tablespoon or two folded in) or a tiny splash of buttermilk powder if you want to keep it dry. This brightens the entire filling without turning it tart. It’s a baker’s trick most folks never learn unless they’ve cried over five test batches.
Storage & Service – The Cold Game
After a full chill, these bars slice like a dream. But only if you do one thing: hot knife, clean cuts. That’s it. Dip in hot water, wipe clean, cut. Repeat.
They hold shape for up to 4 days refrigerated. Past that, the crust starts to go. Freeze them? You could, but texture takes a hit. Only do it if you’re meal-prepping 50 bars for a catering order.
Serve with:
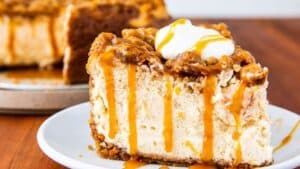
- A dusting of cinnamon sugar
- A dollop of whipped cream
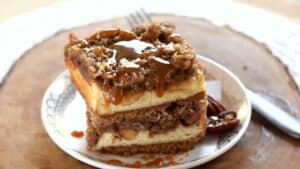
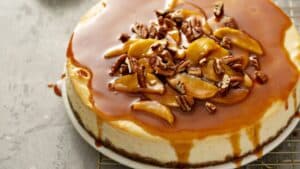
- Crushed candied pecans for crunch
If you’re plating for a restaurant? Add a maple drizzle or even a tiny quenelle of bourbon whipped cream. That’ll sell itself.
Emergin Trends – Let’s Talk Dairy-Free & Vegan Variants
You can’t ignore the shift. Plant-based dessert options have spiked in demand. According to Mintel’s 2024 Plant-Based Eating Report, 34% of U.S. consumers under 35 actively seek dairy-free desserts.
That means if you’re not testing cashew cream cheese or coconut whipped topping, you’re missing out on a major slice of the market. And here’s the good news: these bars adapt beautifully.
- Use coconut oil or vegan butter in the crust.
- Swap cream cheese with brands like Miyoko’s or Kite Hill.
- Use aquafaba (yes, chickpea brine) whipped for structure.
They’re not just decent—they can be damn delicious when dialed in.
But be honest on your menu. If it’s vegan, say so. If it’s dairy-free but contains honey or gelatin? Be clear. Transparency builds trust, especially in dessert.
Common Mistakes That’ll Wreck It
Let’s bullet some truths:
- Using warm cream cheese? Texture goes soupy. Chill it.
- Skipping crust chill time? Crust slides. Always chill it.
- Overmixing whipped cream? You’ll break it. Gentle folds only.
- Not chilling long enough? Bars won’t hold. Minimum 6 hours, ideally 12.
You want perfection? Follow the rules.
Costing and Yield for Kitchens
For professional kitchens, these bars are low-cost, high-margin menu items.
Average cost per 9×9 tray (yields 9–12 bars):
- Ingredients: ~$6–8
- Labor: Low (hands-on time under 25 mins)
- Selling price per bar: $4–$6
That’s $48–$72 in revenue on a sub-$10 investment. Very few desserts match that ROI with such low stress. No bake pumpkin cheesecake bars hit that sweet spot between seasonal indulgence and operational efficiency.
Plus, they scale. Double, triple, sheet pan—you name it. They’re forgiving if you treat them right.
Advanced Variations for Culinary Exploration
Wanna get fancy? Here’s a few spins for elevating this humble dessert:
- Brown Butter Crust: Swap melted butter for browned butter in the base. Deepens nuttiness.
- Mascarpone Addition: Sub half the cream cheese for mascarpone for a silkier texture.
- Chai Spice Mix: Infuse the filling with a custom blend—cardamom, black pepper, ginger.
- Salted Caramel Layer: Add a thin caramel glaze between crust and filling. Pro move.
- Espresso Powder: Just a pinch. Adds unexpected complexity.
Professional dessert menus demand variety, but not always complexity. This is a great canvas.
The Final Word: Creamy, Cold, Craveable
No bake pumpkin cheesecake bars aren’t just another fall trend. They’re a practical, cost-effective, and highly adaptable option that checks every box: flavor, ease, and visual appeal.
In a pro setting, where every hour, ingredient, and inch of oven space counts, these bars can carry their weight and then some.
Just remember: treat the texture with respect. Chill like your reputation depends on it. And spice like you actually taste what you’re making.
Now go make bars that’ll make people stop mid-bite and say, “Wait. What is this?”
You want that pause. That’s when you know you’ve nailed it.