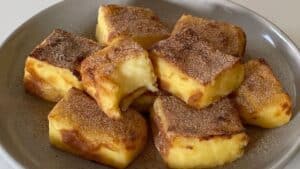
Let me tell you straight up Magic Crust Custard Pie isn’t just a recipe. It’s a little baking sorcery that doesn’t get the spotlight it deserves. You pour one batter into a pan, slide it into the oven, and poof out comes a layered custard pie with a crust that magically forms on its own. No rolling, no chilling, no blind baking. No fuss.
But don’t mistake its simplicity for simplicity’s sake. There’s real technique behind it. The ratio of wet to dry, the fat content in the dairy, the exact temperature—this pie works like a science experiment in grandma’s apron. Let’s break it down like pros.
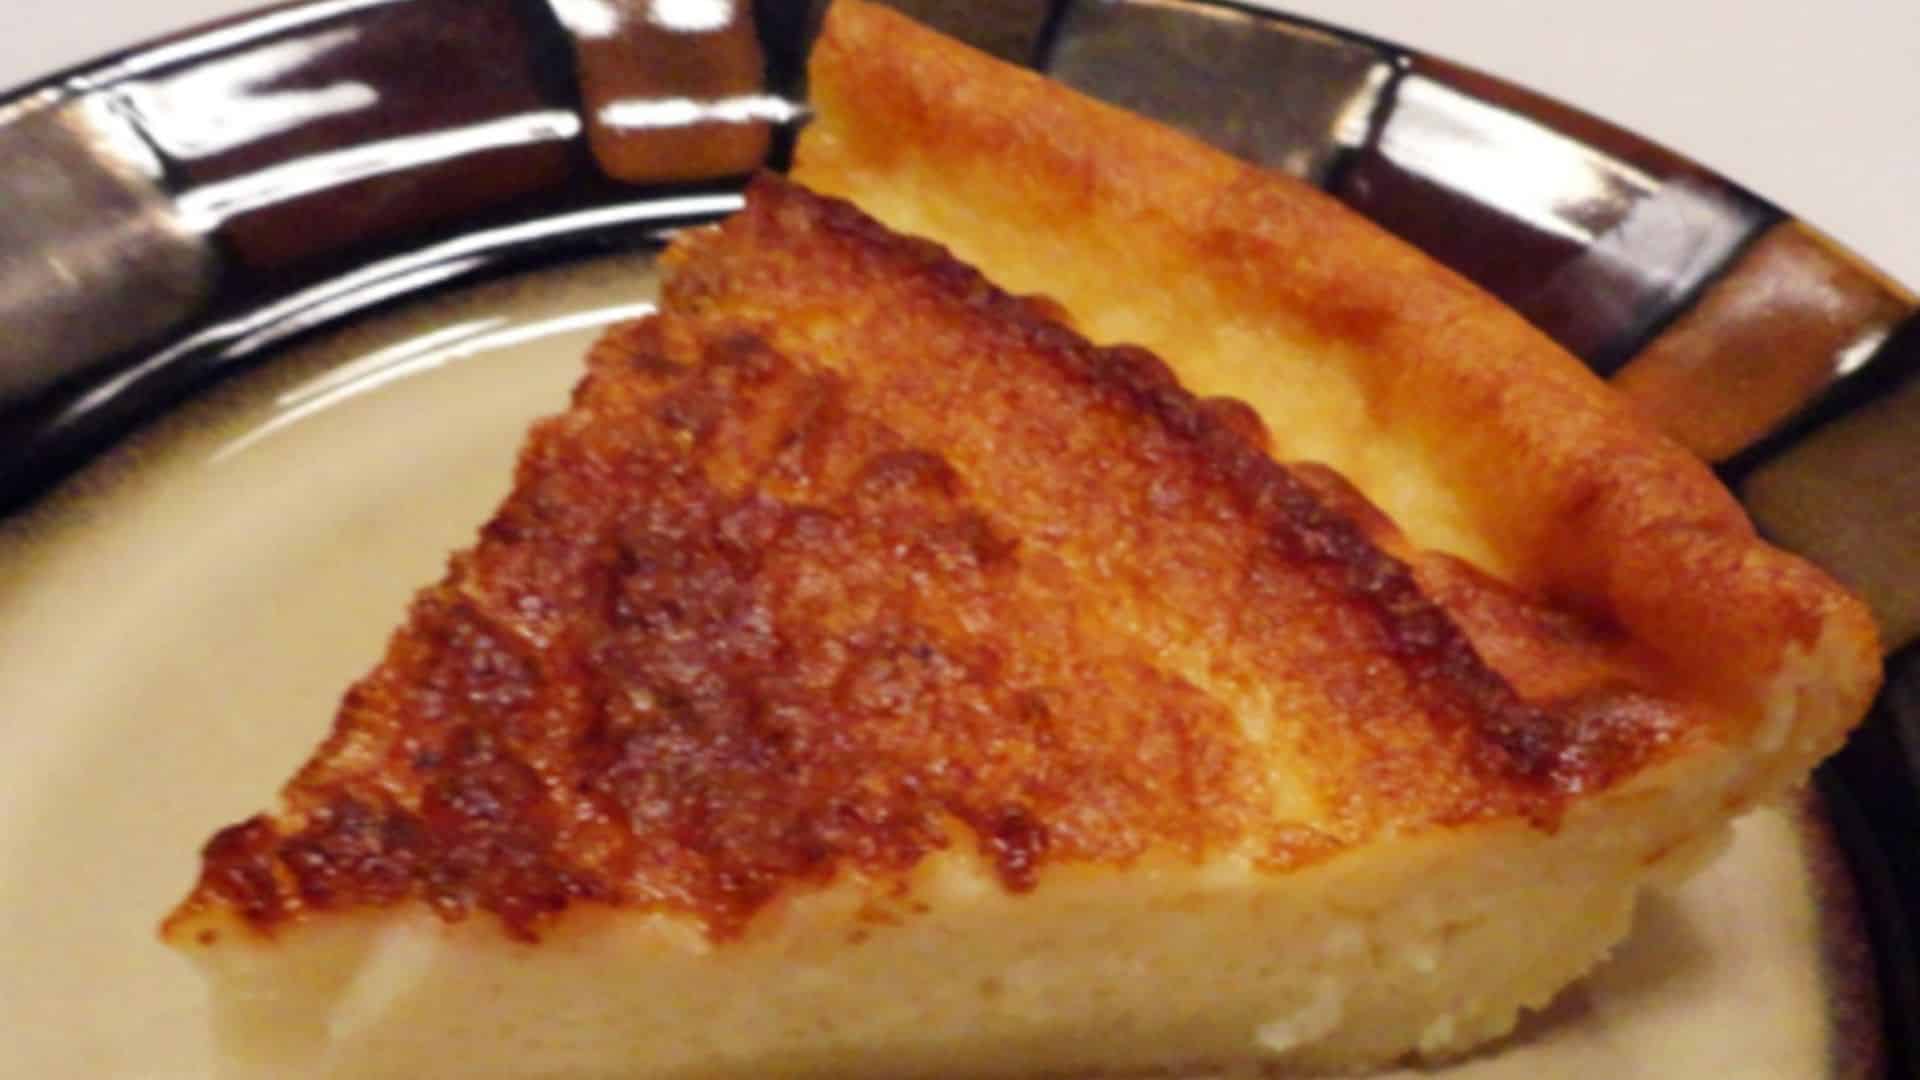
H2: What Exactly is a Magic Crust Custard Pie?
It’s basically a self-layering pie. One batter, three results:
- A soft, golden “crust” forms at the bottom (don’t expect puff pastry here),
- A silky, eggy custard fills the middle,
- And a delicate, golden top bakes over like a little crown.
The magic lies in the batter composition. You mix all the ingredients in one bowl—flour, sugar, eggs, butter, milk, and maybe a touch of vanilla—and then just bake. As it cooks, the flour naturally sinks and forms the crust layer. The eggs and milk create the custard. The rest stays light and airy on top.
It’s not just a party trick. It’s clever culinary architecture.
H2: A Bit of History You Didn’t Ask For (But Should Know)
This pie has roots tangled in the 1950s and ’60s Americana era—where Bisquick™ was queen and women were sold “miracle recipes” that saved time but didn’t skimp on flavor.
Impossible Pie was the name it often wore on old recipe cards. Some say it originated from Betty Crocker’s kitchen; others whisper about Midwest church potlucks. Whatever its origin, the structure of this custard pie is one of the earliest examples of “self-crusting” batters used in American desserts.
Not to be confused with flan or quiche. This one’s drier on top, creamier in the middle, and just about confounding if you overthink it.
H2: Let’s Talk Ingredients—And Why They Matter
This pie isn’t forgiving of shortcuts. You mess with ratios? You get a custard puddle. Or worse, a rubbery mess.
Eggs
You need at least 4 large eggs, room temperature. They’re the scaffolding here. Cold eggs won’t emulsify right and will separate under heat. Also, never skip the yolks unless you like disappointment.
Milk
Use whole milk. Anything lower in fat makes for a sad, soggy base. Want to make it richer? Add a half cup of cream in place of part of the milk. But not too much, or your crust won’t form.
Butter
Melted and slightly cooled. About 4 tablespoons does the trick. Don’t go for margarine unless you’re stuck in 1987.
Flour
Just ½ cup all-purpose flour. Sift it if you care. The flour’s job is to sink and form that magic crust—don’t get cute with almond or coconut flours unless you’re testing failure on purpose.
Sugar & Vanilla
Use around ¾ cup granulated sugar and a good splash of pure vanilla extract. I mean real vanilla, not the synthetic stuff that smells like body spray.
Optional Add-ins
Grated nutmeg on top, shredded coconut mixed in, or even lemon zest if you’re feeling sassy. Just don’t overload it. The batter is fragile like a soufflé with trust issues.
H2: The Science Behind the “Magic”
This pie only works because of specific gravity and protein coagulation. When baked, the flour is denser than the rest, so it sinks to the bottom. The eggs start to set around 160°F, firming the center. Meanwhile, the air bubbles rise, fluffing the top.
If you preheat your oven too low or open the door during baking, it collapses. You get layers from heat stratification—mess with it, and it’s game over.
Want to sound fancy at your next chef’s roundtable? Call it a density-driven thermal suspension layer cake. (Okay, don’t. They’ll throw sourdough at you.)
H3: Technique: Do Not Wing It
Here’s the pro method:
- Preheat the oven to 350°F. Non-negotiable. Use an oven thermometer if you don’t trust yours.
- Butter a 9-inch pie dish generously. This ain’t the time for sprays or light greasing.
- In a mixing bowl, whisk the eggs first until frothy—like 30 seconds, nothing wild.
- Add in sugar, vanilla, and melted butter. Stir until smooth.
- Add the milk gradually while whisking.
- Sift in the flour last. Stir just until combined. Overmix and it goes gummy.
- Pour into the dish. Let it rest 3–5 minutes to let the flour begin to settle.
- Bake for 45–50 minutes. The center should be just set but still jiggle like a polite nod.
Cool it at room temp. No fridge until it’s fully set. Refrigerate after that or it weeps. Literally. Water weeps out of it.
H2: The Crust Conundrum—Why It Sometimes Fails
Don’t let the name fool you. It doesn’t form a crust like shortcrust pastry. It’s more like a firm bottom layer that’s just… there.
Why it might fail:
- You used skim milk (nope).
- You overmixed (flour stayed suspended).
- Your oven temp was off (custard didn’t set right).
- You didn’t wait long enough after pouring before baking (flour didn’t settle).
There’s an elegance to the fail when it happens. But also, a huge letdown.
H2: Elevating It—Pro-Level Variations
Brown Butter Magic Pie
Toast the butter until golden and nutty before adding. That extra layer of flavor is no joke.
Coconut Magic Pie
Add ½ cup shredded unsweetened coconut into the batter. Toast some extra for the top. Total texture upgrade.
Citrus Custard Pie
Lemon zest and a tablespoon of fresh lemon juice. It brightens the richness and plays nice with nutmeg.
Chocolate Swirl Version
Pour ⅓ cup melted semi-sweet chocolate over the batter and drag a toothpick through in spirals. Looks bakery-fancy with zero extra effort.
Savory Take?
Honestly? You could. Swap sugar for salt, add cheddar and chives. But then it’s not a custard pie anymore. It’s a confused quiche cousin. Still good though.
H2: Storage & Shelf Life—Not a Keeper, But It’s Okay
This pie peaks the day it’s made. Store leftovers in the fridge, covered, for up to 3 days. After that, the texture begins to break down. You can warm slices gently in the microwave, but don’t expect day-one magic.
Do not freeze it. Just… don’t. The custard will split, and you’ll cry. (Or maybe not, but you’ll be sad.)
H2: Common Misconceptions—Let’s Clear the Air
“It needs a real crust.”
Nah, that’s the point. It makes its own. Don’t ruin the magic with a pre-baked shell.
“It’s basically quiche.”
Nope. It’s sweeter, more delicate, and not made for ham and spinach.
“Can I use almond milk?”
Technically? Yes. Will it taste right? Absolutely not.
“Can I make it in muffin tins?”
Actually, yes—but reduce the bake time to 20–25 minutes. You’ll get individual custard cups with a crusty base.
H2: Data & Trends—Is It Making a Comeback?
In 2024, search volume for “magic crust custard pie” jumped 38%, according to Google Trends. Why? TikTok happened. A few creators demo’d it, folks were hooked, and the simplicity of the method made it go viral.
Home bakers want low-effort, high-payoff desserts. This one checks all the boxes.
Even pro chefs are leaning in. It’s the kind of dish you can plate rustic or dress up with brûléed sugar on top and a quenelle of whipped cream. The versatility’s there—you just gotta lean in.
H2: Final Thoughts & Pro Tips
This pie is humble, but it’s a marvel. It teaches balance, structure, and how technique can replace tools. No rolling pins, no shell chilling, no lattice work. Just patience, proportion, and trust.
Want to master it? Here’s what you do:
- Get your oven temp right.
- Use good ingredients.
- Respect the batter.
- Don’t expect drama—expect elegance.
It’s not flashy. But damn, it’s satisfying.
And remember—if the crust doesn’t form perfectly the first time, eat it anyway. You’re still winning. That’s the real magic.