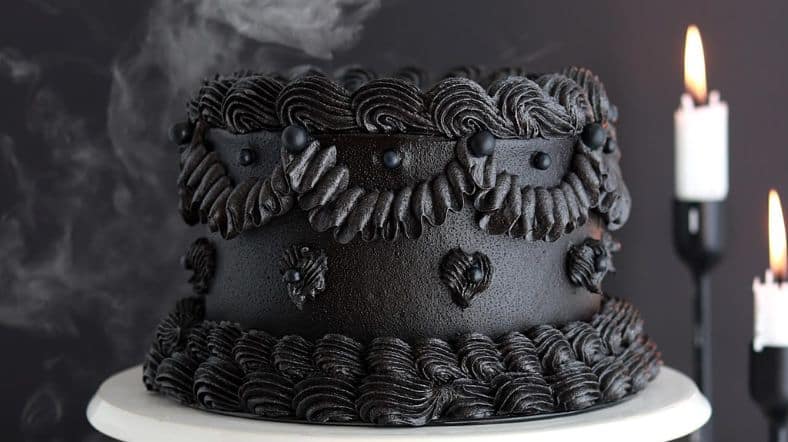
It’s not every day you meet a cake that wears black like it means business. Black velvet cake ain’t your average chocolate sponge with a coat of frosting. It’s a sultry, dramatic twist on the more well-known red velvet cousin—darker, richer, bolder. Like espresso in a world of cappuccinos.
This isn’t just a recipe. This is an exploration into flavor mechanics, texture chemistry, and sensory experience. And yeah, we’re gonna bake it too—but not before we understand it from the bones out.
Because black velvet cake is not about just putting cocoa in batter. It’s an engineered bite of luscious contrast—deeply black yet velvety soft, bittersweet with a whisper of tang, dense but never heavy. If you’re cooking at a professional level, or trying to get there, this cake deserves your attention. And a good oven.
What Makes a Black Velvet Cake Different?
Red velvet gets all the limelight with its gaudy hue and cream cheese frosting. But black velvet walks in like a mystery novel. It’s got more cocoa, less color, and deeper flavor notes—think dark chocolate truffle rather than milk chocolate bar.
The primary elements that set it apart:
- Dutch-processed cocoa instead of natural cocoa. This is key. We’re after low-acid, smooth flavor here.
- Black cocoa powder, often used sparingly, brings a smoky, Oreo-cookie-like depth.
- No red dye. Instead, sometimes activated charcoal or black gel color is added for aesthetics.
- Tang from vinegar and buttermilk, but not as prominent as in red velvet. More refined. Like a wink instead of a shout.
And then there’s texture. The velvet in the name ain’t just marketing. This cake must be tender and plush—tight crumb but not dry, soft but with integrity.
A bit like biting into a whispered secret.
Ingredients: Precision and Punch
Let’s not fluff around. Ingredients matter. One misstep and you’re eating a chocolate doorstop. Here’s what you need and why.
Dry Ingredients
- 1 cup all-purpose flour – Go for unbleached. Protein balance matters.
- ¾ cup granulated sugar – Not too sweet. You want the bitterness to linger a bit.
- ¼ cup black cocoa powder – The real deal, not Hershey’s. This is where you earn your black belt.
- 2 tbsp Dutch-processed cocoa powder – Balances black cocoa, which can be intense and drying.
- ½ tsp baking soda – No baking powder. We’re keeping acidity under control.
- ½ tsp salt – Don’t skip. Ever.
Wet Ingredients
- ½ cup vegetable oil – Neutral, moist, and helps with mouthfeel.
- 2 large eggs – Room temp, no excuses.
- ½ cup full-fat buttermilk – Adds tang, supports rise, and keeps crumb tender.
- 1 tsp vanilla extract – Real, not imitation. Adds roundness.
- 1 tsp white vinegar – Works with baking soda and boosts tenderness.
- ¼ cup hot water or brewed coffee – Wakes up the cocoa. Adds depth.
Optional: ½ tsp black gel food color or ½ tsp activated charcoal powder (cosmetic grade only). For drama, not flavor.
Method: Bake It Like You Mean It
No one wants a lopsided cake with a cracked top. Precision meets intuition here.
Step 1: Prep Like a Pro
Preheat oven to 350°F (175°C). Grease and line two 6-inch pans or one 8-inch round. Use parchment. Don’t skip parchment. Ever try peeling a cake off a pan with your fingernails? Yeah, don’t.
Step 2: Combine Dry Ingredients
In a large bowl, sift together the flours, cocoas, sugar, salt, and baking soda.
Don’t just dump them in. Sifting makes it feel more… intentional. Like you’re building a cake, not just mixing a mess.
Step 3: Mix Wet Ingredients
In another bowl, whisk the eggs, oil, vanilla, and buttermilk. Add the vinegar last. If you’re adding food color or charcoal, mix it in here.
Coffee or hot water goes in slowly, at the end, to bloom the cocoa and keep batter loose.
Step 4: Merge and Mix
Pour wet into dry. Fold gently with a spatula until combined. Don’t overmix. Don’t walk away either. Stay in it.
You want a pourable, silky batter. If it looks like brownie mix, you’ve gone too thick.
Step 5: Bake with Intuition
Pour evenly into pans. Bake 22–26 mins or until a toothpick comes out with a few moist crumbs.
Overbake and you’re in rubber town. Underbake and you’ve got pudding. Check at 20 mins and use your nose—smells will tell you more than a timer.
Cool in pans for 10 mins, then remove and cool completely. Wrap and chill for frosting later. Cold cakes slice better. Fact.
The Frosting Debate: Cream Cheese vs. Ganache
Here’s where things get heated. You want something that cuts the richness without overpowering the cake.
Two directions:
1. Classic Cream Cheese Frosting
- 8 oz cream cheese, softened
- ½ cup unsalted butter, room temp
- 2 cups powdered sugar
- 1 tsp vanilla
- Pinch salt
Whip until fluffy. Chill briefly. Spread like you mean it.
Tip: Add a touch of lemon juice for brightness.
2. Black Cocoa Ganache
For the dark side.
- 8 oz dark chocolate (70% or higher)
- ¾ cup heavy cream
- 1 tbsp black cocoa powder
- 1 tbsp butter
Melt together, stir smooth, let thicken slightly before pouring or whipping.
This one’s glossy, sleek, and dramatic. Perfect for show-stoppers.
Expert Tips for Professional Results
Let’s get serious. If you’re running a bakery, a catering biz, or doing high-end plated desserts, this cake can be your ace.
- Black cocoa is drying. Balance with enough fat and liquid. Test before scaling up.
- Store overnight before serving. Flavor deepens. Texture tightens in a good way.
- Trim domes before frosting. Layering a cake without leveling is like building a house on a hill.
- Serve with textural contrast—think crisp tuile, brittle, or even candied nuts.
“Velvet” is a texture promise. Don’t break it.
Real-World Application: Black Velvet in Restaurants
One NYC pastry chef (Rochelle Marek, formerly of Sable & Coal) added black velvet roulade with espresso cream to her winter menu. Sold out nightly.
Why? Because it’s comfort with edge. Something familiar, but not.
Michelin-starred spots are using it too—deconstructed black velvet with cream cheese ice cream, burnt cocoa crumb, and cherry gel. Fancy, but rooted in solid flavor science.
Common Mistakes to Avoid
Let’s not sugarcoat it. People screw this up.
- Using natural cocoa instead of Dutch-process—you’ll get acidic chaos.
- Overmixing the batter—gluten turns cake into tire rubber.
- Baking in a rush—black velvet needs time. You don’t rush a velvet revolution.
- Underestimating color impact—this cake stains fingers, plates, and napkins. Plan accordingly.
Trends to Watch: The Future of Black Velvet
Cake’s having a cultural moment. But black velvet? It’s carving its niche.
- Plant-based versions with aquafaba and almond buttermilk are trending.
- Mini black velvet loaves as luxury café items.
- Black velvet donuts, éclairs, and macarons in high-end patisseries.
- Even wedding cakes are going gothic-chic with black velvet tiers.
We’re in a moment where bold flavors and striking visuals aren’t just welcome—they’re required.
Final Thoughts and Recommendations
Black velvet cake isn’t here to be cute. It’s here to make a statement. When crafted with skill, it’s a professional-level dessert that whispers complexity but shouts elegance.
Here’s what to keep in mind:
- Source high-quality black cocoa. This is non-negotiable.
- Don’t overcomplicate the batter. The magic is in simplicity.
- Pair flavors that highlight the darkness—citrus, berry, even aged rum.
- Make it your own, but respect the velvet legacy.
A cake like this? It doesn’t just sit on a plate. It owns the plate. It dares the eater to come closer, take a bite, and question everything they knew about chocolate cake.
And the best part? It’s not even that hard to pull off. But when you do it right, people think it took you forever.
Now go bake like you mean it. And maybe wear black. Just in case.