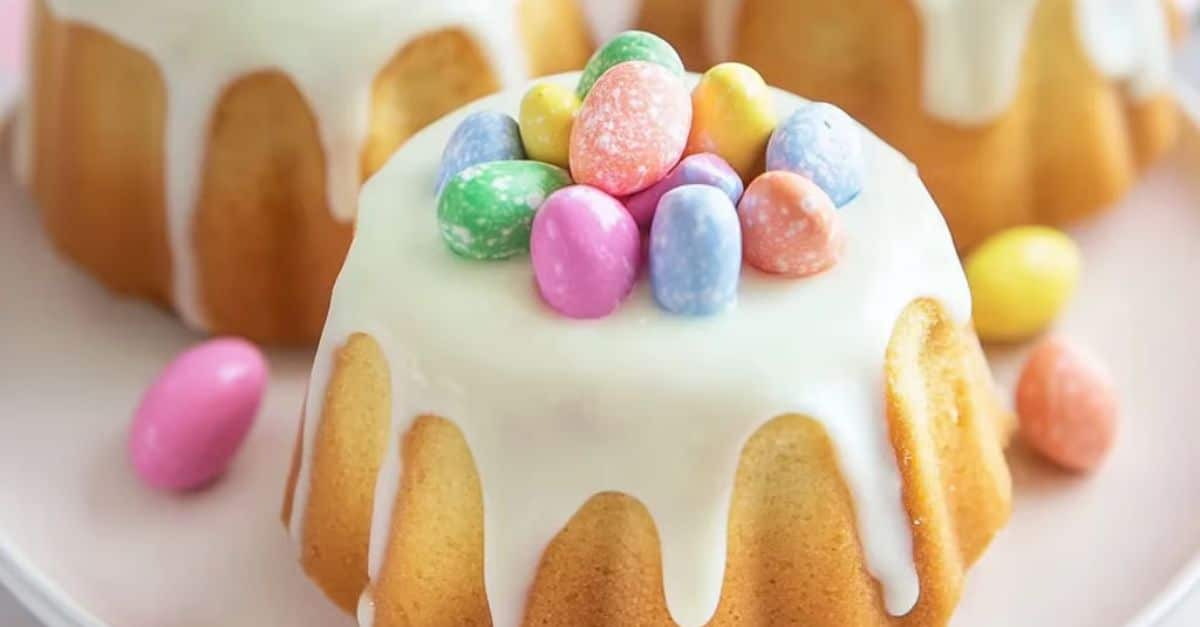
You ever made something so tiny and cute it almost hurt to eat it? That’s these cakes. Mini bundt cakes with candy centers—deceptively adorable, dangerously indulgent, and wildly marketable.
Let’s be honest. These aren’t just about baking anymore. They’re about the reveal. About tapping into people’s love for surprise. Think of it like a piñata you can eat with a fork and frosting. Whether you’re running a boutique bakery or just trying to land your next viral reel, this article dives deep into how you can master—and monetize—these irresistible little devils.
Why Mini Bundt Cakes? Why Now?
Here’s what we know. The mini dessert market is on fire. According to ResearchAndMarkets.com, the global mini dessert category is expected to reach $3.8 billion by 2027. And bundts, with their beautiful ridges and nostalgic feel, are pulling ahead of cupcakes in some circles. Yes, cupcakes are nervous.
Now add a candy center. You’ve got a sensory experience, a dessert-as-entertainment, a literal hidden gem. From birthday parties to bridal showers, these are the kind of treats that turn people into repeat customers.
So what makes these work so well? Two things:
- Portion control without the guilt. A mini bundt is indulgent, but it won’t knock you out like a slab of layer cake.
- Surprise factor. People love a good reveal. When candy pours out, it’s visual, it’s fun, and it’s shareable online.
The Ideal Mold: Don’t Skimp Here
Let’s get nerdy for a sec. Not all mini bundt pans are equal. Cheap silicone molds? Avoid. They warp. Your candy core won’t sit right. You want a mold that holds shape like it’s guarding national secrets.
Nordic Ware mini bundt pans are a top-tier choice. Heavy-duty, nonstick, and they give you that clean, crisp edge every single time. That edge is key. It catches glazes, it frames the center, and it screams “artisan.”
Mold size matters too. 4-inch diameter is perfect for most use cases. It gives enough room for the candy core without making the cake feel empty.
Cake Batter: Structure First, Flavor Follows
This ain’t no box-mix situation. You need structure. A cake that’s too fluffy collapses when you hollow it. Too dense and it’s basically edible cement.
Best bet? A pound cake base or tight-crumb sour cream cake. High-fat content. Moderate sugar. Eggs for lift but not too much. You want a sturdy crumb that can take a carving knife but still melts in your mouth.
Here’s a pro tip—bake slightly under for just a minute or two. Let residual heat finish it off so it doesn’t dry out. Moisture balance is everything.
Flavor-wise, vanilla bean is a universal crowd-pleaser. But lemon zest or almond extract gives it just enough sophistication that even pastry snobs won’t complain.
The Candy Core: Choose Wisely
Now let’s talk innards. This is where it can go very, very wrong.
Don’t just shove in any old candy. Avoid things that melt, sweat, or stick like taffy in a sauna. Mini M&Ms? Great. Sprinkles? Sure, but not just any kind. You want confetti quins or sugar pearls. Jelly beans or gumballs for visual impact? Also a yes.
Stay the hell away from:
- Gummy bears (they melt into sad puddles)
- Rock candy (shard risk, nobody wants blood cake)
- Chocolate chips (melt central)
Quantity tip: Fill the center cavity about halfway up. Overfill and it ruins the base seal. Underfill and your reveal is a sad little thud.
Filling Technique: Precision Is Power
This step separates the bakers from the wannabes. Carving out the center post-bake is fine, but double baking with a molded insert? Even better.
Here’s how pros do it:
- Bake the cake halfway.
- Remove and very quickly press a mini cylinder (aluminum-wrapped dowel works) into the center.
- Continue baking with the dowel in place.
- Remove, cool, then pop out the dowel—perfect candy cavity.
It’s fussy, but it saves post-bake mess and looks insanely clean when sliced.
Glazes, Ganaches, and Glam
You think the cake’s the star? Nope. The outer layer makes or breaks the visual drama. Think of it like wardrobe for your cake.
Glazes should be pourable but set firm. Powdered sugar + milk + a drop of almond extract = basic glaze. Want shimmer? Add edible luster dust. Want drama? Go full mirror glaze with gelatin and cocoa.
Ganache? Melted chocolate + heavy cream. Glossy, rich, and good lord does it elevate.
You can also dip in candy melts and finish with crushed freeze-dried raspberries, gold flakes, or edible flowers. But remember—glam has to complement the core, not overshadow it.
The Assembly: Hidden Magic, Done Right
If you’ve baked the bundt solid and plan to carve, do it once fully cooled. Carve from the bottom, not the top. You’ll be flipping it back over, and no one wants to see surgical scars on their dessert.
Glue the base plug back in using melted chocolate or thick glaze. It acts like edible cement. Let it set fully before serving.
Pro move: Add a thin edible disc (wafer paper or molded chocolate) between the cake and the candy. It holds the candy in place and makes the reveal smoother.
Storage & Shelf Life: Handle With Care
Shelf life on these isn’t as long as a traditional bundt. That center changes the rules. Moisture migrates. Candies sweat. Crunchies go soft.
Here’s the protocol:
- Store in airtight containers, cool and dry.
- Keep shelf-stable candies inside. Avoid things that draw in moisture.
- If glazed, they’re best within 48 hours.
- Refrigeration? Only if the filling allows. Otherwise, it ruins texture.
And don’t stack ’em. Please. That’ll ruin all that delicate detailing and give your cakes a flat top. No one wants a squashed bundt.
Pricing for Profit: Charge What It’s Worth
These aren’t $3 cupcakes. These are handmade, filled, layered with craftsmanship. If you’re selling, price accordingly.
Breakdown:
- Ingredients: ~$1.75 per cake (high-end)
- Packaging: $0.50 per unit (custom box = more)
- Labor: 12 mins per unit = $3.00+ (assuming $15/hr rate)
- Overhead + Profit Margin: $2.00+
Minimum retail price should sit around $7–$9, and that’s conservative. For events, they can fetch $12+ each, especially with themed colors or custom fillings.
Common Mistakes to Avoid
Bakers mess these up all the time. Here’s what to watch out for:
- Overfilling molds: You lose the core or get ugly edges.
- Using fragile batters: They crumble like a breakup.
- Skipping the chill time: Warm cake + candy = sad gooey mess.
- Cheap pans: You’ll regret it the second they warp mid-bake.
And don’t forget the cardinal sin: too much glaze. It’s not a shower. It’s a drizzle.
Trends & Twists: What’s Next?
Keep your ear to the ground. People are already taking this trend in wild directions:
- Savory versions with cheese centers and cornbread bases (brilliant for brunch catering).
- Themed reveals (gender reveals with blue/pink M&Ms—still a bestseller).
- Infused centers like Bailey’s chocolates or boozy truffles.
- Holiday adaptations with peppermint pieces or pumpkin spice cake bases.
TikTok bakers are layering edible glitter inside, making the candy burst look like a damn firework.
Don’t get left behind. These are fast becoming a seasonal staple in upscale bakeries.
Final Thoughts: Your Game Plan
Want to add these to your menu? Start testing now. Tweak batter ratios. Try new fillings. Set up your packaging.
Here’s what to focus on:
- Master the mold: That shape is your signature.
- Perfect the core: Every bite should be a memory.
- Test shelf stability: If it can’t hold, it can’t sell.
- Price with confidence: Don’t undercut your skills.
If you do it right, these cakes won’t just be cute. They’ll be a brand. A trend you own. Something people tag your business in and talk about at dinner tables.
And hey—if nothing else—watching that candy fall out never gets old.
Even if you’ve made a thousand.