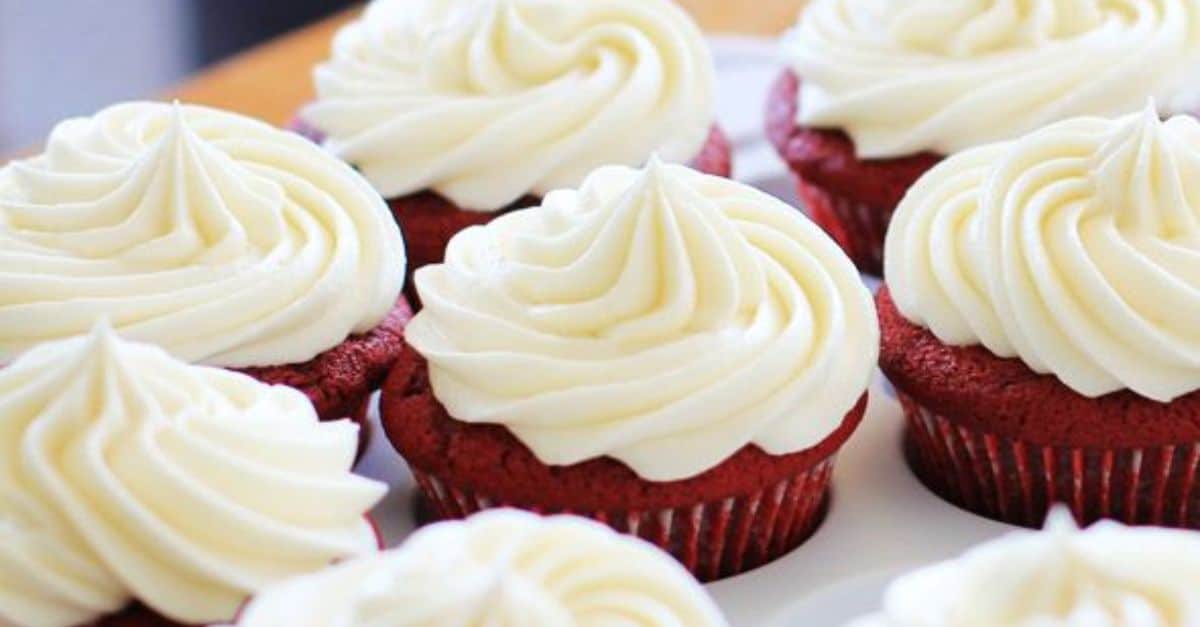
There’s somethin’ wickedly luxurious about red velvet cupcakes. They’re not just red. They’re not just cake. They’re an unapologetic contradiction: rich yet airy, sweet yet tangy, old-school but kinda flirty. And when you swirl that cream cheese frosting on top? It ain’t just dessert it’s drama in a paper cup.
So yeah, this ain’t just a recipe breakdown. This is a deep-dive for the folks behind the piping bag—professional pastry chefs, boutique bakers, culinary educators, and all you quiet geniuses testing crumb structure at midnight.
Let’s talk technique, chemistry, and let’s get a little obsessive about the details because in red velvet, the margin between brilliant and boring is thinner than a cupcake liner.
The Origin Story Is Murkier Than Cream Cheese Left on the Counter
Red velvet is not Southern by birthright, although it’s often claimed that way.
Back in the early 1900s, velvet cakes were already a thing—”velvet” referred to the fine, plush texture from cocoa softening the gluten structure. The red tint? Likely a chemical accident from natural cocoa powder reacting with acidic buttermilk or vinegar.
But here’s the twist—the dramatic red we know today? That’s all 1940s marketing genius, courtesy of Adams Extract Company. They wanted to sell food coloring, and boom: the red velvet boom was born.
Don’t buy the myth that red velvet is just chocolate cake dyed red. That’s lazy baking and even lazier thinking. This cake has less cocoa than a typical chocolate cake, and the acidic profile is way higher. It’s its own beast.
Let’s Talk Chemistry: The Real Magic Behind the Hue
If you’re making red velvet and you’re not thinking about pH balance, then you’re not really making red velvet. You’re making red cake.
Here’s what’s going on chemically:
- Natural cocoa powder (not Dutch-processed) has a pH around 5.4–5.8. It’s acidic.
- Combine that with buttermilk (pH 4.4–4.8) and vinegar (pH ~2.4), and now we’re in a zone where the anthocyanins in cocoa show off their red side.
- But if you’re using Dutch-process cocoa? You’re neutralizing that acidity and killing the chance for the natural hue to even peek out.
So yeah, don’t use Dutch-process cocoa if you actually care about flavor and color. Also, for the love of texture—never skip the vinegar. It ain’t there for kicks.
The Crumb: Light, But It Shouldn’t Crumble Like Bad News
A legit red velvet cupcake should be moist, tender, with a slight bounce when you press it. You don’t want it dense like a brownie, but it also shouldn’t feel like foam rubber from a mattress factory.
That comes down to emulsion and mixing discipline.
Use cake flour, not all-purpose. Less protein = less gluten = softer crumb. If you’re out, you can DIY by replacing 2 tablespoons of every cup of AP flour with cornstarch, but that’s a workaround, not gospel.
Creaming the butter and sugar? Go long on this—at least 4–5 minutes, medium-high. Get that mixture airy. Otherwise, your cupcakes will just sit there, heavy as regret.
Overmix once the flour’s in? You’ll toughen the crumb. You’re not kneading dough. Fold like your career depends on it.
Coloring: Let’s Be Real About the Dye
Here’s the part no one says out loud: you’re gonna need red food coloring, and yes, it’s a lot.
We’re talkin’ 1 to 2 tablespoons of liquid food color or a concentrated gel. Professionals prefer gel-based colors (like AmeriColor Super Red or Chefmaster), which don’t dilute the batter.
Now, here’s the kicker. If you’re marketing these bad boys in a “natural” bakery—your clients will ask about the dye. Be ready.
Beet powder? Looks good in theory. But it fades like a bad sunburn when baked. You need encapsulated beet pigments (expensive) or an anthocyanin-stabilizing formula to keep the hue. Ain’t nobody got time for that in a 3AM bake.
So just… own the food color. And maybe add “classic-style” to your label if the health food folks come knocking.
Buttermilk or Bust: The Heartbeat of Red Velvet
Let’s get one thing straight—you can’t sub whole milk in this batter and still call yourself a pro.
Buttermilk isn’t just there to moisten. It’s an acid, an emulsifier, and a flavor amplifier.
No buttermilk? Then DIY it with a tablespoon of vinegar per cup of milk and let it sit 10 mins. But again, that’s survival mode, not pro mode.
What buttermilk does:
- Reacts with baking soda to create lift.
- Helps preserve the soft crumb.
- Adds that signature tang.
Miss this and you’ll be explaining to your clients why your cupcakes are beige and bland. Ain’t a good look.
Cream Cheese Frosting: The Frosting That Fights Back
Here’s the truth most bakers learn the hard way: cream cheese frosting is a diva.
One minute it’s thick, luscious, and dreamy. The next, it’s sliding off your cupcakes like it’s trying to run away from commitment.
Key rules:
- Use brick-style cream cheese, not whipped or spreadable. If it comes in a tub, throw it out.
- Always mix it cold. Room temp softens too fast, and you’ll lose structure.
- Use a higher butter-to-cheese ratio for piping (like 2:1), or it’ll collapse like bad meringue.
- Powdered sugar is not a stabilizer—too much makes it grainy and overly sweet. You ain’t covering a funnel cake.
Pro tip: Add a tablespoon of cornstarch or a pinch of gelatin (bloomed and melted) for high-humidity environments. It holds better under pressure.
Also, add a touch of lemon juice or salt to cut the sweetness. Makes a world of difference.
Bake Time: Get a Thermometer, Not a Prayer
Relying on a toothpick is cute if you’re in grandma’s kitchen. In pro kitchens, use an instant-read thermometer. Center of the cupcake should read around 200–205°F (93–96°C).
Bake at 350°F (175°C), 18–22 mins depending on the oven. But watch like a hawk starting at minute 17. Every oven lies. Don’t trust the dial.
Also, don’t bake red velvet in convection mode unless you’re stabilizing the batter. The fan can cause the tops to dome weird or even crack. Bake static.
Common Pitfalls: Mistakes You Shouldn’t Still Be Making
Let’s call out the usual suspects:
- Flat tops? Overmixed or under-leavened. Probably both.
- Sinking centers? Opened the oven door too soon. Or your baking soda’s old. Or both.
- Dry texture? You overbaked, or your flour measurement was off. Are you still scooping flour with a cup instead of weighing it? Fix that.
- Frosting too runny? Warm ingredients, or you went heavy on the cheese. Chill it. Or whip it again with a bit more butter.
Scaling for Volume: Batch Bakes Without Breaking the Bank
Once you nail your formula, the real test is scaling.
Use baker’s percentages. Convert your recipe to weight and base everything off the flour (100%). Makes it scalable whether you’re baking 12 or 1,200.
Invest in portion scoops—Size 24 is standard for cupcakes (~1.33 oz batter). Helps with consistency, speed, and bake time control.
Use a muffin pan with uniform heating, and rotate halfway if your oven has hot spots.
Trends Worth Watching: Velvet Reinvented
Mini cupcakes are still hot in catering. They offer flavor without the commitment, and guests love them.
Hybrid velvets (blue velvet, black velvet) are making a scene, but honestly? Still a gimmick unless you balance the flavors correctly.
What’s legit interesting right now:
- Savory red velvet with goat cheese and herbs for upscale amuse-bouche.
- Freeze-dried red velvet dust used as garnish over plated desserts.
- Infused cream cheese frostings: think earl grey, yuzu, or burnt honey.
If you’re stuck offering just red velvet + frosting, you’re already behind.
Final Thoughts: Red Velvet Isn’t Easy—But It’s Worth the Fight
This cupcake is a show-off, and it knows it.
It will test your discipline, chemistry chops, and presentation skills. It’s not for the lazy baker or the shortcut taker.
But when done right? The crumb glows like velvet. The frosting stands tall. And customers? They remember it. They crave it.
Master red velvet and you don’t just add a flavor to your menu. You earn a reputation.
And in the world of pastry—that’s priceless.
Now go bake like you mean it.